Home / Open Shelving in Kitchens
Open Shelving in Kitchens
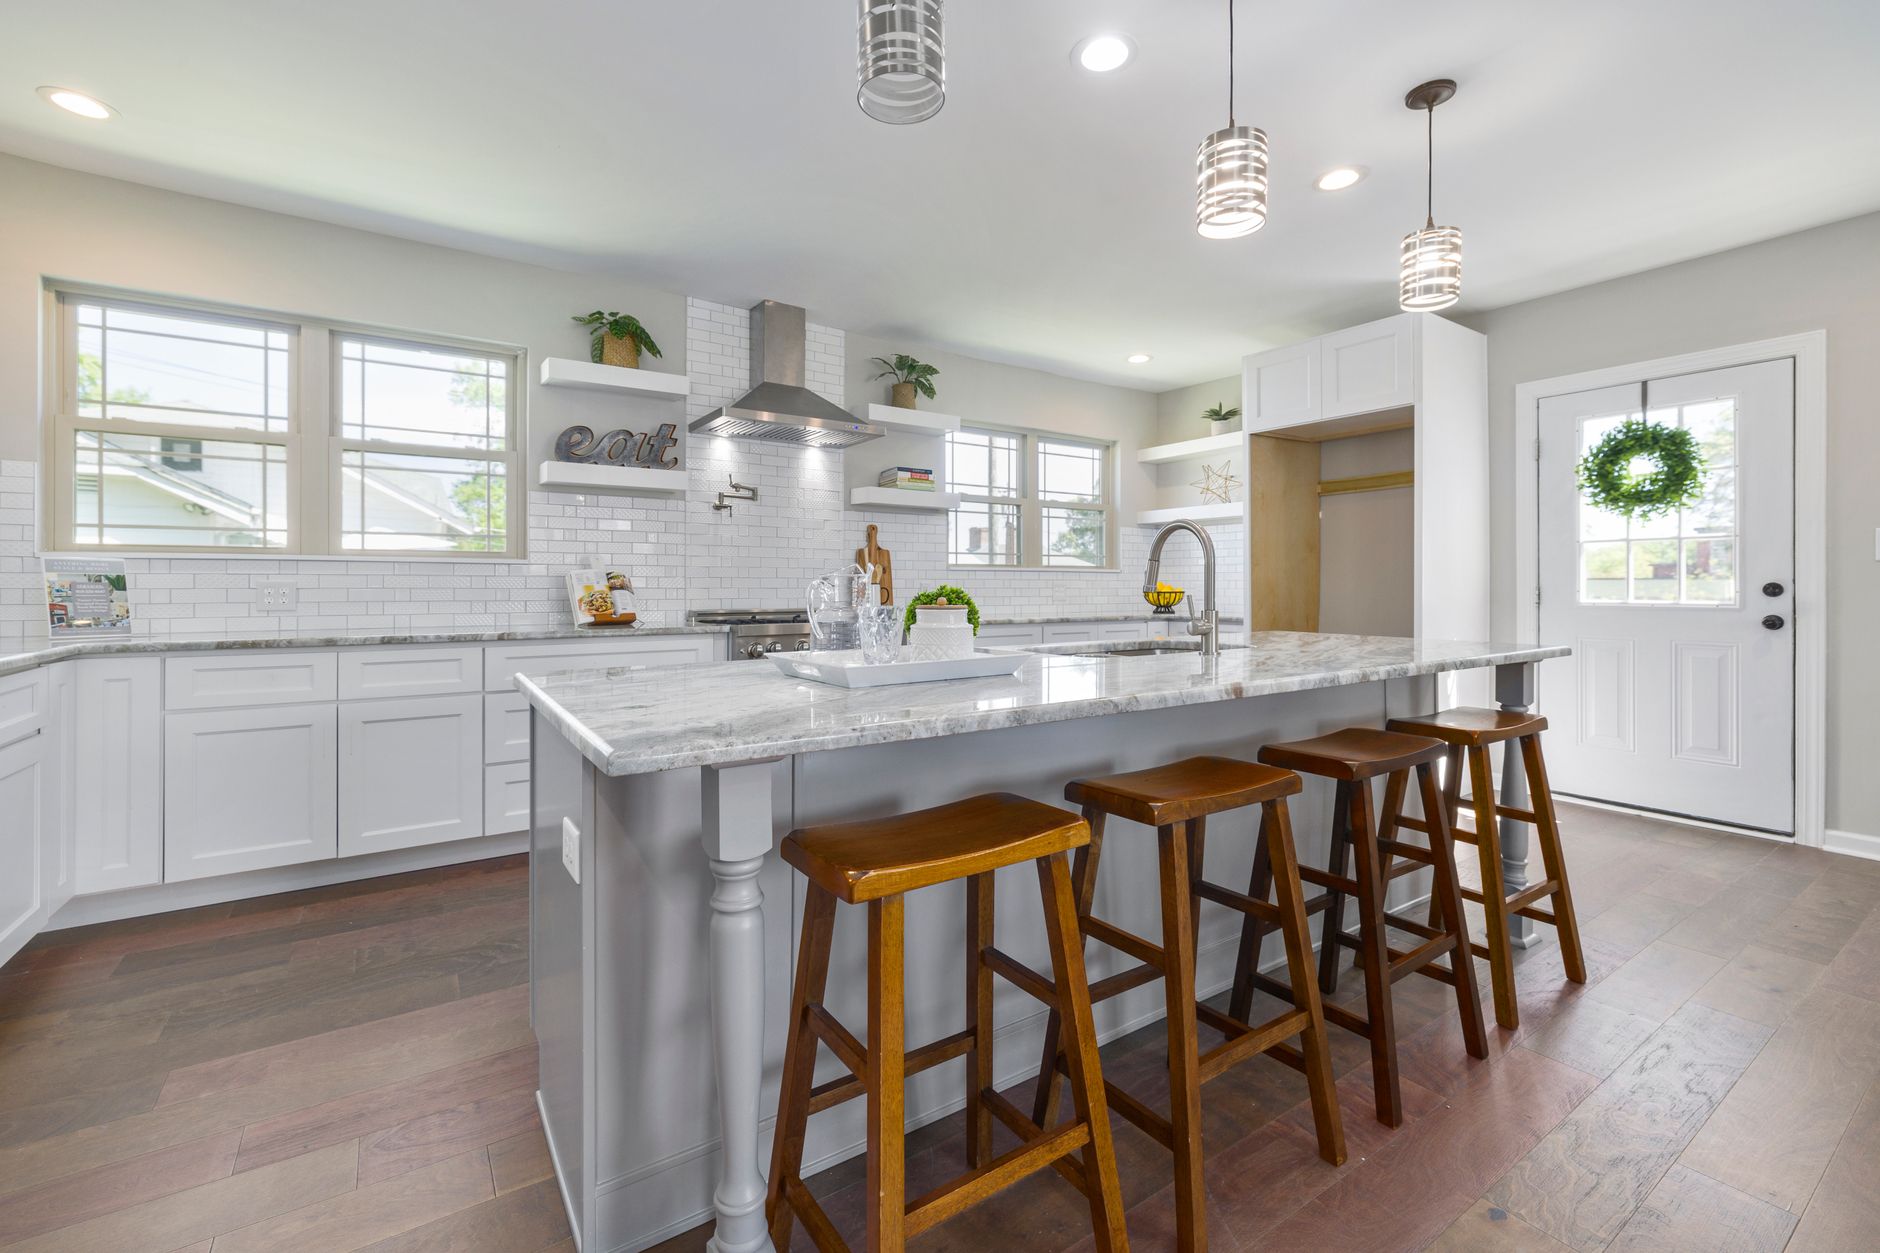
Open shelves look effortless in photographs and demanding in real life. They replace a cabinet door with a view of whatever is on the shelf, which is lovely when the contents are tidy and tiring when they are not. Deciding whether they belong in a kitchen comes down to three practical questions: where they sit, what they will carry and how often they will be cleaned. The rest of this guide goes through each.
Where open shelves work best
The best locations are the ones that stay clear of the main cooking zone. A shelf directly above a cooktop collects grease in a fine, sticky film, which then traps dust. A shelf beside a window, at the end of a cabinet run or over a coffee station sees far less grease and is usually the better bet.
Good spots to consider:
- The wall at the end of a counter run, where a pair of shelves can replace a short upper cabinet.
- Above a beverage or coffee area, holding mugs and glasses used every day.
- Beside the refrigerator, as a place for cookbooks and a small plant.
- Between a window and the ceiling, where a single long shelf can carry display pieces.
Avoid running open shelves along the entire wall in place of all upper cabinets unless the household is committed to constant tidiness. A mix of open and closed storage usually works best, with closed cabinets handling the clutter and open shelves handling the nice things.
What loads they can carry
Dishes are heavier than they look. A stack of everyday plates, a set of bowls and a few mixing bowls can add up to a substantial weight on a single shelf. The strength of an open shelf depends on three things: the thickness and material of the board, the spacing and type of brackets, and what the brackets are attached to.
A solid hardwood board around an inch and a half thick resists sagging better than a thin veneered panel. Spans matter, too. The longer the span between supports, the more a board will bow over time, so heavy loads call for closer bracket spacing. Brackets that screw into wall studs carry weight far better than anchors set only into drywall. A shelf intended for dishes should always be tied into framing.
The dust and grease reality
Anything stored in the open collects a thin coating of dust, and in a kitchen it mixes with airborne cooking oil. The result is a faint film that needs washing, not just wiping. Glasses and plates stored on open shelves usually need a quick rinse before use, and the shelves themselves need a regular wipe with a mild degreasing solution.
Strategies that reduce the burden include storing only items that are used often, since regular use keeps them clean. Putting rarely used serving pieces behind doors helps. A good range hood vented to the outside reduces airborne grease significantly, and keeping shelves at least a few feet from the cooktop makes an even bigger difference.
Choosing materials and finishes
Wood is the traditional choice, and it suits most styles. Hardwoods such as oak, maple and walnut hold up well. Softer woods dent easily, which can look charming or sloppy depending on taste. Sealed wood handles the occasional splash, but standing water or steam will eventually mark it, so a hard-wearing clear finish is worth the effort.
Other options include stone, which is heavy and needs strong supports, glass, which looks light but shows every smudge, and metal, which suits industrial looks. Painted boards can match the wall for a subtle effect or contrast with it for emphasis. Edges matter as well: a thick, square edge looks substantial, while a thin edge looks refined.
Spacing and heights
Standard practice puts the lowest shelf about eighteen inches above the counter, high enough to clear small appliances and low enough to reach. Spacing between shelves depends on the items. Dinner plates need around ten to twelve inches of clear height, glasses a bit less, and tall items like pitchers or cookbooks more. A shelf set too tight forces items to be wedged in, and one set too loose wastes wall space.
Depth is often overlooked. Shelves around ten inches deep hold dinner plates comfortably, while a deeper shelf encourages double stacking, which hides the back row and invites clutter. Shallower shelves of six or seven inches work for spices, small jars and cups.
Keeping the look organized
Open shelving rewards a consistent system. Dishes in matching colors look calm, while a random mix of patterns looks busy. Group like items together: glasses with glasses, bowls with bowls. Leave a bit of empty space on each shelf so the arrangement can breathe and so there is room to add a new item.
A short set of habits helps. Return items to the same place after washing. Add one decorative item per shelf at most, such as a small plant, a cutting board or a ceramic piece. Rotate seasonal items rather than leaving everything out year round. For longer project write-ups that show how real households handled this, bellevue kitchen remodeling works has articles that walk through complete kitchens.
When to skip open shelves
Open shelves are a poor fit for several kitchens. A household with small children may find the dishes too reachable and too breakable. Someone who cooks with a lot of oil and high heat may find the cleaning burden tiresome. A kitchen with little storage overall may need every inch of closed cabinet space, since the contents of an open shelf have to look good all the time. And anyone who dislikes dusting should be honest about it, because open shelves will not forgive neglect.
A good test is to look at the current upper cabinets and imagine every item visible. If most of the contents would look presentable, open shelves are probably a good idea. If the cabinets hold a jumble of mismatched containers, a plan to replace the contents should come first, or the shelves will look worse than the doors they replaced.
A balanced approach
The most practical plan is often a hybrid. Keep closed cabinets for daily clutter, bulky appliances and rarely used items, and add one or two open shelves where they will be seen and used. This gives the room visual breathing space and a place for personality, without turning cleaning into a weekly project. Start with a single shelf, live with it for a few months and add more only if it earns its keep.
Shelf edges and brackets as design details
The thickness of the board changes the whole feel. A slim edge appears light and modern, while a chunky edge appears rustic or sculptural. Brackets can disappear or become a feature: simple black steel L-shapes suit a casual look, while hidden rods suit a seamless one. Matching bracket color to the wall makes them recede, and matching them to the board makes the shelf look like one piece. Whatever the choice, keep the style consistent along the whole wall so the shelves look planned, not added later.